—
—
# A Simple Text Editor in C# #
In this tutorial you will learn how to build a simple text editor application, including:
* A toolbar with buttons * A text entry area * File saving and loading capabilities * Message popups
| WARNING | ||
| — | ——- | — |
|  | Some C# classes are currently in BETA state<br>They should only be used for experimenting and NOT for any product development.<br>These classes are marked as BETA in the reference documentation.<br>The source code for the tutorials is subject to change in the future. |  |
## Prerequisites ##
* Read the [Setting Up a C# Development Environment](/develop/setup/csharp/) guide so you are able to build and run EFL C# applications. * This tutorial builds on top of the previous one, [Graphical “Hello World” in C#](hello-world-gui-cs.md), so you should have read that one first.
## The Code ##
Copy the code below into a file and build it as instructed in the [Setting Up a C# Development Environment](/develop/setup/csharp/) guide. You can also find this file in the [EFL examples repository](https://git.enlightenment.org/enlightenment/examples) in [`apps/csharp/texteditor`](https://git.enlightenment.org/enlightenment/examplestree/apps/csharp/texteditor).
```csharp /* Simple text editor with a main text box and a toolbar on top:
 +vbox----------------------------------------+
 | +hbox------------------------------------+ |
 | | +btn-+ +btn-+ +btn-+ +box-----+ +btn-+ | |
 | | |NEW | |SAVE| |LOAD| | spacer | |QUIT| | |
 | | +----+ +----+ +----+ +--------+ +----+ | |
 | +----------------------------------------+ |
 | +text------------------------------------+ |
 | |                                        | |
 | |                                        | |
 | |         Main text box                  | |
 | |                                        | |
 | |                                        | |
 | +----------------------------------------+ |
 +--------------------------------------------+
*/
using System;
public class TextEditor {
  private Efl.Ui.Win win;                  // The main window
  private Efl.Ui.Text editorTextBox;       // The main text entry
  private Efl.Ui.Button toolbarButtonNew;  // The "New" button in the toolbar
  private Efl.Ui.Button toolbarButtonSave; // The "Save" button in the toolbar
  private Efl.Ui.Button toolbarButtonLoad; // The "Load" button in the toolbar
private bool edited = false; // Document was edited since last save
  // File to load and save is fixed since we do not use a file selection dialog
  private readonly string filename = System.IO.Path.Combine(System.IO.Path.GetTempPath(),
                                                            "texteditor_example.txt");
  // Quits the application
  private void GUIQuitCb(object sender, Efl.Gfx.EntityVisibilityChangedEvt_Args ea)
  {
      if (ea.arg == false)
          Efl.Ui.Config.Exit();
  }
  // Enables or disables buttons on the toolbar as required
  private void GUIToolbarRefresh()
  {
      // "New" is enabled if there is text in the text box
      toolbarButtonNew.SetDisabled(string.IsNullOrEmpty(editorTextBox.GetText()));
      // "Save" is enabled if the text has been modified since last save or load
      toolbarButtonSave.SetDisabled(!edited);
      // "Load" is enabled if there is a file to load
      toolbarButtonLoad.SetDisabled(!System.IO.File.Exists(filename));
  }
  // Called when the text in the editor has changed
  private void EditorChangedCb(object sender, EventArgs ea)
  {
      edited = true;
      GUIToolbarRefresh();
  }
  // Shows a modal message popup with an "OK" button
  private void ShowMessage(string message)
  {
      var popup = new Efl.Ui.TextAlertPopup (win);
      popup.SetText(message);
      popup.SetExpandable(new Eina.Size2D(200, 200));
      popup.SetButton(Efl.Ui.AlertPopupButton.Positive, "OK", null);
      popup.ButtonClickedEvt +=
          (object sender, Efl.Ui.AlertPopupButtonClickedEvt_Args ea) => {
        // Dismiss popup when the button is clicked
        ((Efl.Ui.TextAlertPopup)sender).SetParent(null);
      };
  }
  // Adds a button to the toolbar, with the given text, icon and click event handler
  private Efl.Ui.Button GUIToolbarButtonAdd(Efl.Ui.Box toolbar, string name,
                                            string iconName, EventHandler func)
  {
      var button = new Efl.Ui.Button(toolbar);
      button.SetText(name);
      button.ClickedEvt += func;
      button.SetHintWeight(0, 1);
      // Set the content of the button, which is an image
      var image = new Efl.Ui.Image(toolbar);
      image.SetIcon(iconName);
      button.SetContent(image);
      toolbar.DoPack(button);
      return button;
  }
  // Creates a new toolbar, with all its buttons
  private void GUIToolbarSetup(Efl.Ui.Box parent)
  {
      // Create a horizontal box container for the buttons
      var bar = new Efl.Ui.Box(parent);
      // 0 vertical weight means that the toolbar will have the minimum height
      // to accommodate all its buttons and not a pixel more. The rest of the
      // space will be given to the other object in the parent container.
      bar.SetHintWeight(1, 0);
      bar.SetDirection(Efl.Ui.Dir.Horizontal);
      parent.DoPack(bar);
      // "New" button
      toolbarButtonNew = GUIToolbarButtonAdd(bar, "New", "document-new",
        (object sender, EventArgs ea) => {
            // When this button is clicked, remove content and refresh toolbar
            editorTextBox.SetText("");
            GUIToolbarRefresh();
        });
      // "Save" button
      toolbarButtonSave = GUIToolbarButtonAdd(bar, "Save", "document-save",
        (object sender, EventArgs ea) => {
            // When this button is clicked, try to save content and refresh toolbar
            try {
              System.IO.File.WriteAllText(filename, editorTextBox.GetText());
              edited = false;
              GUIToolbarRefresh();
              ShowMessage("Saved!");
            } catch (Exception e) {
              // If something fails, show the error message
              ShowMessage(e.Message);
            }
        });
      // "Load" button
      toolbarButtonLoad = GUIToolbarButtonAdd(bar, "Load", "document-open",
        (object sender, EventArgs ea) => {
            // When this button is clicked, try to load content and refresh toolbar
            try {
              editorTextBox.SetText(System.IO.File.ReadAllText(filename));
              edited = false;
              GUIToolbarRefresh();
              ShowMessage("Loaded!");
            } catch (Exception e) {
              // If something fails, show the error message
              ShowMessage(e.Message);
            }
        });
      // Spacer box to use all available space not required by buttons
      // (It has a default horizontal weight of 1, whereas all buttons have
      // a horizontal weight of 0).
      // As a result, it pushes the "Quit" button to the right margin and
      // the rest to the left.
      Efl.Ui.Box box = new Efl.Ui.Box(parent);
      bar.DoPack(box);
      // "Quit" button
      GUIToolbarButtonAdd(bar, "Quit", "application-exit", (object sender, EventArgs e) => { Efl.Ui.Config.Exit(); } );
  }
  // Builds the user interface for the text editor
  public TextEditor()
  {
      // Create a window and initialize it
      win = new Efl.Ui.Win(parent: Efl.App.AppMain);
      win.SetText("Text Editor");
      win.SetAutohide(true);
      win.VisibilityChangedEvt += GUIQuitCb;
      // Create a vertical box container
      Efl.Ui.Box box = new Efl.Ui.Box(win);
      win.SetContent(box);
      // Create the toolbar and add it to the box
      GUIToolbarSetup(box);
      // Create the main text entry
      editorTextBox = new Efl.Ui.Text(box);
      editorTextBox.SetFont("Mono", 14);
      editorTextBox.Multiline = true;
      editorTextBox.Editable = true;
      editorTextBox.Scrollable = true;
      editorTextBox.SetHintSizeMin(new Eina.Size2D(360, 240));
      editorTextBox.ChangedEvt += EditorChangedCb;
      editorTextBox.ChangedUserEvt += EditorChangedCb;
      box.DoPack(editorTextBox);
      // Initial refresh of the toolbar buttons
      GUIToolbarRefresh();
  }
  // This method won't return until the application quits
  public void Run()
  {
      // Start the EFL main loop
      Efl.Ui.Config.Run();
  }
}
public class Example { #if WIN32
[STAThreadAttribute()]
#endif
  public static void Main()
  {
      // Initialize EFL and all UI components
      Efl.All.Init(Efl.Components.Ui);
      var textEditor = new TextEditor();
      textEditor.Run();
      // Shutdown EFL
      Efl.All.Shutdown();
  }
} ```
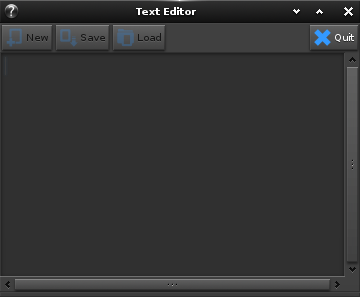
When you run the application, it should look something like this:
## Walkthrough ##
This tutorial builds on top of the previous one, [Graphical “Hello World” in C#](hello-world-gui-cs.md), so you should be familiar with the basics of creating an EFL application and adding widgets to it. The following sections explain how to build this particular user interface and how to react to the different events.
You can use the navigation menu on the side to jump to the section you are most interested in.
### The User Interface Structure ###
A rough sketch of the application's user interface structure is depicted in the code's opening comment:
```
 +vbox----------------------------------------+
 | +hbox------------------------------------+ |
 | | +btn-+ +btn-+ +btn-+ +box-----+ +btn-+ | |
 | | |NEW | |SAVE| |LOAD| | spacer | |QUIT| | |
 | | +----+ +----+ +----+ +--------+ +----+ | |
 | +----------------------------------------+ |
 | +text------------------------------------+ |
 | |                                        | |
 | |                                        | |
 | |         Main text box                  | |
 | |                                        | |
 | |                                        | |
 | +----------------------------------------+ |
 +--------------------------------------------+
```
The main widget is a vertical container box (`vbox`) with two children: the toolbar and the main text entry.
The toolbar is a horizontal container box (`hbox`) full of buttons. If you are looking at the final image above, bear in mind that the toolbar itself is invisible (as are all box containers); only the buttons are visible.
In between the toolbar buttons there's an empty container box (also invisible) to act as a separator: it uses up all available space, effectively pushing buttons on either side to the far ends of the container. See [The Space Box](#The_Spacer_Box) section for details.
Each time the content of the text box changes, the toolbar is refreshed to enable or disable some of the buttons. For example, the Save button is only enabled (clickable) if there is text to save (i.e. the text box is not empty). See the [Refreshing the Toolbar](#Refreshing_the_Toolbar) section for details.
To keep this example simple a file selection dialog has not been used. Therefore, file saving and loading actions always act on the same file, located in the system's temporary folder. For example: `/tmp/texteditor_example.txt`.
### The Main Method ###
```csharp
  public static void Main()
  {
      // Initialize EFL and all UI components
      Efl.All.Init(Efl.Components.Ui);
      var textEditor = new TextEditor();
      textEditor.Run();
      // Shutdown EFL
      Efl.All.Shutdown();
  }
```
The Main method simply initializes EFL, instantiates a `TextEditor` object and relinquishes control to it. The bulk of the work is done by the `TextEditor` class defined in the example. When `texteditor.Run()` returns EFL is shut down and the application finishes.
`texteditor.Run()` contains the call to `Efl.Ui.Config.Run()` which will block until EFL is instructed to quit using `Efl.Ui.Config.Exit()`, as seen in the [Graphical “Hello World” in C#](hello-world-gui-cs.md) tutorial.
This structure is not strictly necessary for such a brief example, but it mimics what a more complex application would normally do.
### Building the Text Editor ###
The constructor for the `TextEditor` class builds the User Interface sketched above. The process is split in this tutorial into different sections for clarity.
First, a window is created as explained in previous tutorials:
```csharp
  public TextEditor()
  {
      // Create a window and initialize it
      win = new Efl.Ui.Win(parent: Efl.App.AppMain);
      win.SetText("Text Editor");
      win.SetAutohide(true);
      win.VisibilityChangedEvt += GUIQuitCb;
```
The `parent` parameter is named explicitly in the argument list to `new Efl.Ui.Win()` just for example purposes. Some widgets accept multiple parameters in their constructors so sometimes it is handy to name them explicitly.
Then the vertical container box is created and set as the content for the window:
```csharp
      // Create a vertical box container
      Efl.Ui.Box box = new Efl.Ui.Box(win);
      win.SetContent(box);
```
The toolbar containing all the buttons is created and added to the box (explained in the next section):
```csharp
      // Create the toolbar and add it to the box
      GUIToolbarSetup(box);
```
Finally, the text entry area is added. This is the main feature of the text editor, so it is worth describing in more detail:
```csharp
      // Create the main text entry
      editorTextBox = new Efl.Ui.Text(box);
      editorTextBox.SetFont("Mono", 14);
      editorTextBox.Multiline = true;
      editorTextBox.Editable = true;
      editorTextBox.Scrollable = true;
      editorTextBox.SetHintSizeMin(new Eina.Size2D(360, 240));
      editorTextBox.ChangedEvt += EditorChangedCb;
      editorTextBox.ChangedUserEvt += EditorChangedCb;
      box.DoPack(editorTextBox);
```
For convenience, some widget's properties can be accessed through regular C# properties besides the `Set()` and `Get()` methods used so far. For instance, the `Editable` flag (explained below) can be manipulated through the `Efl.Ui.Text.Editable` property besides the `Efl.Ui.Text.SetEditable()` and `Efl.Ui.Text.GetEditable()` methods.
Let's take a closer look:
* `Efl.Ui.Text.SetFont()` sets the font family and size for the text area. The font string has to follow `fontconfig`'s convention for naming fonts, as it is the underlying library used to query system fonts (see the output of the `fc-list` command). Alternatively, you can use the full path to a font file.
* `Efl.Ui.Text.Multiline` selects whether the text area will support more than one line of text (`true` is customary for a text editor).
* `Efl.Ui.Text.Editable` sets whether the text can be modified by the user or it is only meant for output. If set to `true` all editing facilities (like keyboard input handling and caret positioning) will be enabled.
* `Efl.Ui.Scrollable` selects whether the text area should automatically use scroll bars to accommodate text longer than can be shown in the window. If enabled, the caret will always be kept visible when typing. If disabled, when typing beyond the edge of the window you won't see the new characters.
* `Efl.Ui.SetHintSizeMin()` sets a minimum size for the text area, as seen in previous tutorials.
Furthermore, handlers are installed for two events: `ChangedUserEvt` is triggered when the text content changes in response to user actions (for example, a key has been pressed). `ChangedEvt` is triggered when the text content changes for any other reason (both events are never triggered together).
This example uses the same handler for both events (`EditorChangedCb()`), which only records the fact that the text has been edited in an internal variable and refreshes the toolbar.
Note how only two objects have been added to the vertical box: the toolbar and the text area. If no further configuration is done these two objects will share the vertical space in the box at 50% each, creating a very tall toolbar. The configuration of the toolbar prevents this, as shown in the next section.
The last step when building the User Interface is to refresh the toolbar, so the buttons reflect their initial states (explained in the [Refreshing the Toolbar](#Refreshing_the_Toolbar) section):
```csharp
      // Initial refresh of the toolbar buttons
      GUIToolbarRefresh();
  }
```
The user interface has now been built and is ready to be shown once the EFL main loop is executed (by calling `Efl.Ui.Config.Run()` in `TextEditor.Run()`).
The following sections describe each part of the user interface in more detail .
### Building the Toolbar ###
This is done in the `GUIToolbarSetup()` method:
```csharp
  private void GUIToolbarSetup(Efl.Ui.Box parent)
  {
      // Create a horizontal box container for the buttons
      var bar = new Efl.Ui.Box(parent);
      bar.SetHintWeight(1, 0);
      bar.SetDirection(Efl.Ui.Dir.Horizontal);
      parent.DoPack(bar);
      [... Buttons are added to the toolbar ...]
  }
```
As it can be seen, the toolbar is just a regular horizontal box container. Please note the `SetHintWeight(1, 0)` line: Giving a widget a weight of 0 means that its parent container will allocate only the minimum room to fit it. The rest of the space will be used by the other children of the container, in this case, the text area.
The rest of this method adds the different buttons by using the helper function `GUIToolbarButtonAdd()` described below.
### Adding a Button to the Toolbar ###
Let's examine this helper method to create and customize a button, while adding it to a parent container:
```csharp
  private Efl.Ui.Button GUIToolbarButtonAdd(Efl.Ui.Box toolbar, string name,
                                            string iconName, EventHandler func)
  {
      var button = new Efl.Ui.Button(toolbar);
      button.SetText(name);
      button.ClickedEvt += func;
      button.SetHintWeight(0, 1);
      // Set the content of the button, which is an image
      var image = new Efl.Ui.Image(toolbar);
      image.SetIcon(iconName);
      button.SetContent(image);
      toolbar.DoPack(button);
      return button;
  }
```
The function instantiates an `Efl.Ui.Button` (as a child of the toolbar) and returns it after configuration:
* The button's label is set with `SetText()`
* The method to call when the button is clicked is set by installing an event handler for the `ClickedEvt` event.
* The button is given a horizontal weight of 0, so its parent (the toolbar) will allocate for it the minimum space.
* The button is added to the toolbar with `DoPack()`.
* Finally, the requested icon is added to the button. Like many other EFL widgets, Buttons are highly customizable. In fact, this example uses an image but any widget (or combination of widgets) could be put inside the Button.
The price for this flexibility is a bit more setup work. Please read the [Parts tutorial](parts.md) to learn more about this topic (*coming soon*).
### The “New” Button ###
This is how the “New” button is created in the `GUIToolbarSetup()` method:
```csharp
      // "New" button
      toolbarButtonNew = GUIToolbarButtonAdd(bar, "New", "document-new",
        (object sender, EventArgs ea) => {
            // When this button is clicked, remove content and refresh toolbar
            editorTextBox.SetText("");
            GUIToolbarRefresh();
        });
```
Its label is `“New“` and it uses the icon named `”document-new“`. When clicked, it will simply empty the `editorTextBox` and refresh the toolbar.
### The “Save” Button ###
The “Save” button instantiation is similar to that of the “New” button:
```csharp
      // "Save" button
      toolbarButtonSave = GUIToolbarButtonAdd(bar, "Save", "document-save",
        (object sender, EventArgs ea) => {
            // When this button is clicked, try to save content and refresh toolbar
            try {
              System.IO.File.WriteAllText(filename, editorTextBox.GetText());
              edited = false;
              GUIToolbarRefresh();
              ShowMessage("Saved!");
            } catch (Exception e) {
              // If something fails, show the error message
              ShowMessage(e.Message);
            }
        });
```
The clicked event handler does a bit more work, though:
* It performs file operations, so the body of the handler is enclosed in a `try {} catch` clause. In case an exception is thrown its error message is shown using a popup (see the [Showing a Popup Message](#Showing_a_Popup_Message) section).
* The whole content of the `editorTextBox` is retrieved with `GetText()` and written to a file:
```csharp
System.IO.File.WriteAllText(filename, editorTextBox.GetText());
```
`filename` is a read-only variable in this example, for simplicity.
* Once the file has been written, the `edited` flag is set to `false` to indicate that there are no pending changes to commit to disk. This has the effect to disable the “Save” button as shown in the [Refreshing the Toolbar](#Refreshing_the_Toolbar) section. The toolbar is manually refreshed by calling `GUIToolbarRefresh()` so this change is visible immediately.
* A popup is shown to indicate that the operation succeeded (see the [Showing a Popup Message](#Showing_a_Popup_Message) section).
### The “Load” Button ###
The “Load” button is very similar to the “Save” one:
```csharp
      // "Load" button
      toolbarButtonLoad = GUIToolbarButtonAdd(bar, "Load", "document-open",
        (object sender, EventArgs ea) => {
            // When this button is clicked, try to load content and refresh toolbar
            try {
              editorTextBox.SetText(System.IO.File.ReadAllText(filename));
              edited = false;
              GUIToolbarRefresh();
              ShowMessage("Loaded!");
            } catch (Exception e) {
              // If something fails, show the error message
              ShowMessage(e.Message);
            }
        });
```
The operation is the opposite of the “Save” button: the text is read from the file and set as the content of the `editorTextBox` with `SetText()`.
The `edited` flag is also updated, the toolbar refreshed and a popup message is shown.
### The Spacer Box ###
It is more or less traditional that the “Quit” button is located on the right-hand side of the window (think of the `X` button on the top-right corner of every window on most desktops) whereas the rest of the buttons (the “Command” buttons) are stacked on the left side.
A simple mechanism to achieve this in EFL is to insert a spacer widget between the command and the quit buttons which uses up all available space, pushing all buttons to either side of the spacer as far as they can go.
Any widget can act as an spacer, the only thing required of it is that it uses up space. To reduce complexity and unwanted side effects, an empty container widget is ideal for the job. For example, a `Box`:
```csharp
      Efl.Ui.Box box = new Efl.Ui.Box(parent);
      bar.DoPack(box);
```
To ensure that all available space is given to the spacer and not distributed evenly among all sibling buttons, the spacer is given a horizontal weight of 1 (it's the default value, so there is no need to use `SetHintWeight()`) whereas the rest of the buttons have a horizontal weight of 0 (as seen in the [Adding a Button to the Toolbar](#Adding_a_Button_to_the_Toolbar) section).
How a container widget distributes available space among its children is a complex topic explained in more detail in a different tutorial (*coming soon*).
### Showing a Popup Message ###
Applications typically convey important informational or error messages through “modal” popup dialogs, which block the application until acknowledged by the user. This would be an example:
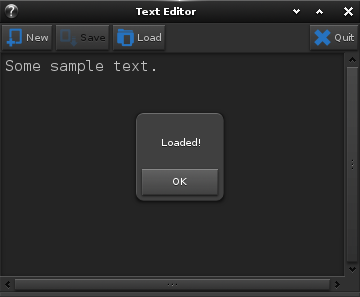
To achieve this EFL uses the `Efl.Ui.Popup` class and its derivatives, for instance, the `Efl.Ui.TextAlertPopup` used in this tutorial. This class implements a popup that contains text and optional configurable buttons.
This is how it's used in this tutorial, in the `ShowMessage()` method:
```csharp
  // Shows a modal message popup with an "OK" button
  private void ShowMessage(string message)
  {
      var popup = new Efl.Ui.TextAlertPopup (win);
      popup.SetText(message);
      popup.SetExpandable(new Eina.Size2D(200, 200));
      popup.SetButton(Efl.Ui.AlertPopupButton.Positive, "OK", null);
      popup.ButtonClickedEvt +=
          (object sender, Efl.Ui.AlertPopupButtonClickedEvt_Args ea) => {
        // Dismiss popup when the button is clicked
        ((Efl.Ui.TextAlertPopup)sender).SetParent(null);
      };
  }
```
* The main text is set with `SetText()`.
* By default the popup has the width required to display all buttons and a fixed height. If the text does not fit in that area a vertical scroll bar is shown, which can be inconvenient when there's room enough in the window to make a bigger popup dialog. `SetExpandable()` allows extending the popup size beyond its default size if required, so that no scroll bars are needed when the text is large.
* `SetButton()` customizes the optional buttons of the popup. Alert popups can have 3 buttons: one for Positive answers, one for Negative answers and one that is user-defined. `SetButton()` changes the text and icon of each of these buttons, which are invisible by default until `SetButton()` is called.
* When any of the buttons are pressed, the `ButtonClickedEvt` event is emitted. The event argument specifies which button has been pressed, in case there's more than one button enabled (in this example there is no need to check the event argument because there is only one button).
* In this tutorial pressing the “OK” button dismisses the popup, which is done by removing the widget in the `ButtonClickedEvt` event handler. To delete a widget, the reference held by its parent must be removed using `SetParent(null)`.
### Refreshing the Toolbar ###
Command buttons do not need to be always available. When a certain action cannot be performed its button can be disabled with `SetDisabled()`, graying it out and making it un-clickable. The `GUIToolbarRefresh()` enables or disables each command button based on the internal state of the editor:
```csharp
  private void GUIToolbarRefresh()
  {
      // "New" is enabled if there is text in the text box
      toolbarButtonNew.SetDisabled(string.IsNullOrEmpty(editorTextBox.GetText()));
      // "Save" is enabled if the text has been modified since last save or load
      toolbarButtonSave.SetDisabled(!edited);
      // "Load" is enabled if there is a file to load
      toolbarButtonLoad.SetDisabled(!System.IO.File.Exists(filename));
  }
```
* The “New” button clears the content of the editor, therefore, it only makes sense when the editor is not already empty.
* The “Save” button is only enabled when the content of the editor has been changed. The internal variable `edited` is set to `true` in the `EditorChangedCb` event handler and to `false` whenever the file is saved or loaded.
* The “Load” button is only available when the file to load, which is always the same in this example, exists.
`GUIToolbarRefresh()` is called whenever the internal state of the editor changes to ensure that the user interface reflects it.
## Summary ##
At the end of this tutorial you have learned:
* How to create complex user interfaces by nesting widget containers. * How to create a toolbar with buttons located in specific positions. * How to set and retrieve the content of a text entry, for example, to save and load it from a file. * How to use message popups.
## Further Reading ##
[Setting up a C# Development Environment](/develop/setup/csharp/) : Read this before trying to develop with the EFL and C#
[Graphical “Hello World” in C#](hello-world-gui-cs.md) : Explains the basics of creating an EFL application and its user interface.
[Tutorial Code Examples](https://git.enlightenment.org/enlightenment/examplestree/apps/csharp/texteditor) : C# Source code for this tutorial.