Map Widgets
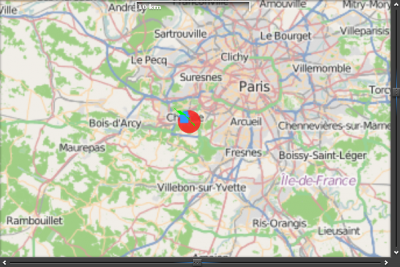
The map widget displays a geographic map. The default map data are provided by the OpenStreetMap project. Custom providers can also be added.
It supports some basic but yet nice features:
- zooming
- scrolling
- markers with content to be displayed when user clicks over them
- group of markers
- routes
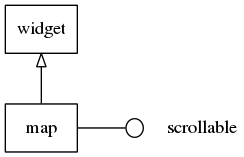
The map widget implements the scroller interface so that all the functions that work with the scroller widget also work with maps.
Table of Contents
Related Info
Adding a Map
Once created with the elm_map_add() function, zoom level x12 can be set.
Evas_Object *map = elm_map_add(parent);
elm_map_zoom_mode_set(map, ELM_MAP_ZOOM_MODE_MANUAL);
elm_map_zoom_set(map, 12);
Here the zoom mode is set to manual, there the list of all the available options:
ELM_MAP_ZOOM_MODE_MANUAL- Zoom controlled manually byelm_map_zoom_set(). It's set by default.ELM_MAP_ZOOM_MODE_AUTO_FIT- Zoom until map fits inside the scroll frame with no pixels outside this area.ELM_MAP_ZOOM_MODE_AUTO_FILL- Zoom until map fills scroll, ensuring no pixels are left unfilled.
Playing with the Map
If we have coordinates of a specific area (2 2 N, 48 8 E), we can show it on the map.
elm_map_region_show(map, 2.2, 48.8);
This shows the desired coordinates. We can also show the location with a bring-in animation.
elm_map_region_bring_in(map, 2.2, 48.8);
The map is rotated 90 degrees around the current position.
elm_map_rotate_set(map, 90, 2.2, 48.8);
Drawing Overlays
Overlays are markers that can be placed anywhere on the map. They can represent any object we want to put on the map.
Creating an Overlay Class
Overlay classes can be created if several objects are of the same type. For example, we create a forest overlay class to represent the forests visible on the map. We set the minimum zoom level at which this class is visible. The forest class overlay is visible when the zoom level is superior to eight.
We set an icon (“Home” icon here) to the forest class. This icon is displayed in place of the forest class on the map.
Evas_Object *icon;
Elm_Map_Overlay *forest_class = elm_map_overlay_class_add(map);

// Set min zoom level at which class is displayed
elm_map_overlay_displayed_zoom_min_set(forest_class, 8);

// Create a Home icon object and set it to the forest class
icon = elm_icon_add(map);
elm_icon_standard_set(icon, "home");
elm_map_overlay_icon_set(forest_class, icon);
Adding Overlays to a Class
After creating a forest class, we can add overlay objects to it. Here we
create an overlay for the Meudon forest. Data is linked to the overlay with
the elm_map_overlay_data_set() function. We set the name of the forest in
the data. The icon can be set to the overlay with the
elm_map_overlay_icon_set() function.
Elm_Map_Overlay *ovl;
const char* data_meudon = "Meudon forest";
const char* data_fausses = "Fausse forest";

// Add an overlay
ovl = elm_map_overlay_add(map, 2.20718, 48.79759);
icon = elm_icon_add(map);
elm_icon_standard_set(icon, "stop");
elm_map_overlay_icon_set(ovl, icon);
elm_map_overlay_data_set(ovl, &data_meudon);

// Add the new ovl object to the forest class
elm_map_overlay_class_append(forest_class, ovl);

// Add another overlay next to the first one
ovl = elm_map_overlay_add(map, 2.1699, 48.8189);
icon = elm_icon_add(map);
elm_icon_standard_set(icon, "stop");
elm_map_overlay_icon_set(ovl, icon);
elm_map_overlay_data_set(ovl, &data_fausses);
elm_map_overlay_class_append(forest_class, ovl);
If we add another overlay to the forest class, the two overlays can be grouped under the forest class icon on certain zoom level conditions. We can define on which zoom level items are grouped.
elm_map_overlay_class_zoom_max_set(forest_class, 8);
In this case, overlay members of the forest class are grouped when the map is displayed at less than zoom level eight.
Creating Bubbles Following Overlays
This is how to set a content in a bubble following an overlay.
// Add an overlay bubble object
Elm_Map_Overlay *bubble = elm_map_overlay_bubble_add(map);

// Set it to follow a specific overlay (the last created one here)
elm_map_overlay_bubble_follow(bubble, ovl);
Once following an overlay, the bubble appears, moves or hides following the parent overlay's behavior.
Content is added to the bubble with the
elm_map_overlay_bubble_content_append() function.
Adding Other Overlays
We can draw a circle on the map with coordinates and a radius size.
Elm_Map_Overlay *circle = elm_map_overlay_circle_add(map, 2.2, 48.8, 0.02);
We can also add a scale at the 200×0 coordinate (in pixels).
Elm_Map_Overlay *scale = elm_map_overlay_scale_add(map, 200, 0);
Or we can draw a line, a polygon, or a route. See the full API for a full description of these functions.
Calculating Routes
A route between a starting point and an ending point is calculated with the
elm_map_route_add() call. The type of transport and the routing
calculation method can be provided so as to have the desired result.
In this example, we want a route calculation between the first and the second overlay. We configure it to use the bicycle, and we want to find the fastest route in time.
Elm_Map_Route *route = elm_map_route_add(map,
         ELM_MAP_ROUTE_TYPE_BICYCLE,
         ELM_MAP_ROUTE_METHOD_FASTEST,
         2.20718, 48.79759,
         2.1699, 48.8189,
         NULL, NULL);

// Add a callback to when the route has been calculated and loaded
evas_object_smart_callback_add(map, "route,loaded", _route_loaded_cb, route);
Once the route is calculated, we can create a route overlay object and change its color. In this example, we use the “route,loaded” callback.
static void
_route_loaded_cb(void *data, Evas_Object *obj, void *ev)
{
   Elm_Map_Route *route = data;

   Elm_Map_Overlay *route_ovl = elm_map_overlay_route_add(obj, route);
   elm_map_overlay_color_set(route_ovl, 0, 255, 0, 255);
}
Using Map Callbacks
The map widget emits the following callbacks:
“clicked”- This is called when a user has clicked the map without dragging around.“clicked,double”- This is called when a user has double-clicked the map.“press”- This is called when a user has pressed down on the map.“longpressed”- This is called when a user has pressed down on the map for a long time without dragging around.“scroll”- the content has been scrolled (moved).“scroll,drag,start”- dragging the contents around has started.“scroll,drag,stop”- dragging the contents around has stopped.“scroll,anim,start”- scrolling animation has started.“scroll,anim,stop”- scrolling animation has stopped.“zoom,start”- Zoom animation started.“zoom,stop”- Zoom animation stopped.“zoom,change”- Zoom changed when using an auto zoom mode.“tile,load”- A map tile image load begins.“tile,loaded”- A map tile image load ends.“tile,loaded,fail”- A map tile image load fails.“route,load”- Route request begins.“route,loaded”- Route request ends.“route,loaded,fail”- Route request fails.“name,load”- Name request begins.“name,loaded”- Name request ends.“name,loaded,fail”- Name request fails.“overlay,clicked”- A overlay is clicked.“loaded”- when a map is finally loaded. (since 1.7)“language,changed”- the program's language changed“focused”- When the map has received focus. (since 1.8)“unfocused”- When the map has lost focus. (since 1.8)
| Map Examples | ||
|---|---|---|
| Creation and Zoom | Overlay Usage | Route and Name Usage |

