previous page__: Creating a Zoom Effect
=== Elementary Animations ===
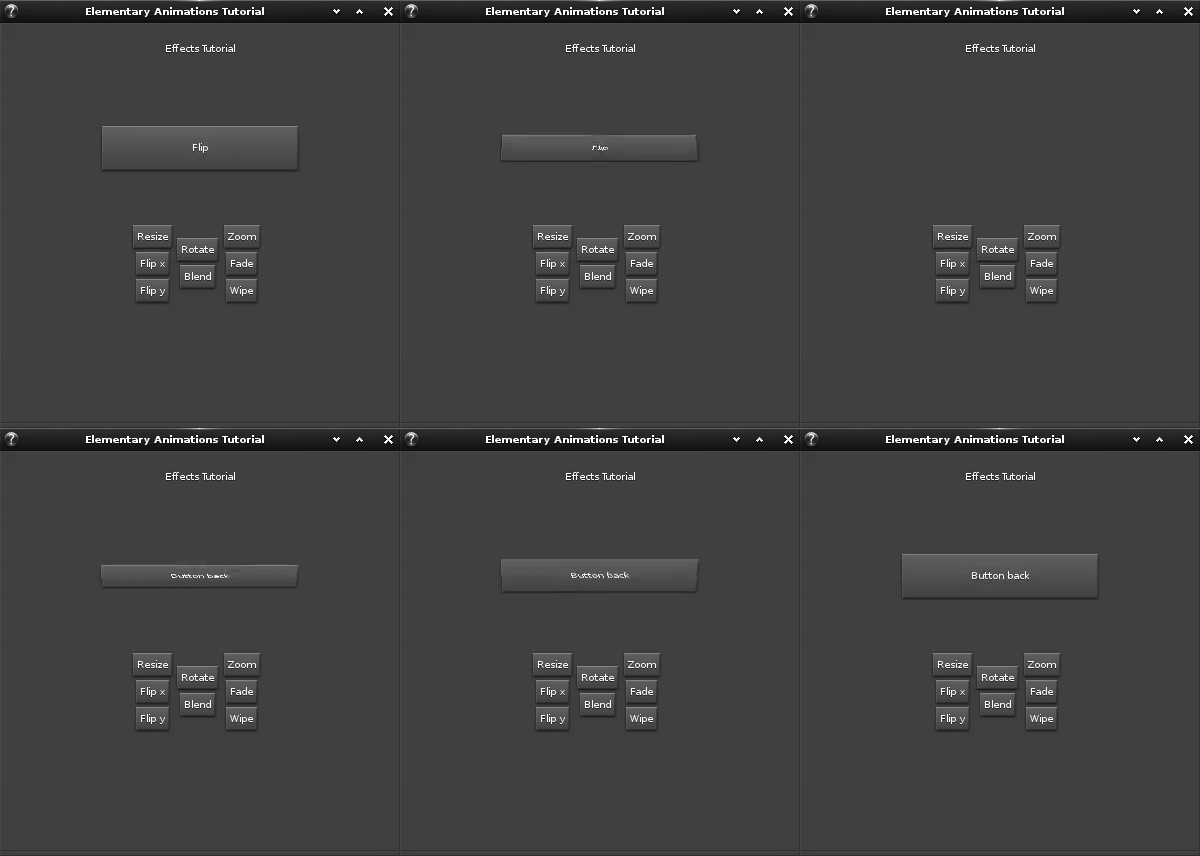
==== Creating a Flip Effect ====
This effect is applied to a pair of objects, in the order they are added, to
the Elm_Transit transition. In this example, add the animation target
button and the button called buttonbck which represents the back of the target
button.
 Create the action button for the flip effect:
<code c>
The flip button
Evas_Object *btn_flip = elm_button_add(win);
elm_object_text_set(btn_flip, “Flip x”);
evas_object_size_hint_weight_set(btn_flip, EVAS_HINT_FILL, EVAS_HINT_FILL);
evas_object_show(btn_flip);
evas_object_smart_callback_add(btn_flip, “clicked”, _btn_flip_cb, &anim);
elm_box_pack_end(left_vbox, btn_flip);
</code>
The corresponding callback to create and start the animation with the two
objects (target button and back button) to animate is like follows.
<code c>
static void
_btn_flip_cb(void *data, Evas_Object *btn, void *ev)
{
Animations *anim = (Animations *)data;
Setting the button text
elm_object_text_set(anim->button, “Flip”);
_flip_effect(anim->button, anim->buttonbck);
}
</code>
Create the function which runs the animation. This flip animation is created
using
 elm_transit_effect_flip_add. The second parameter is the axis of the
flip: in this example it is the X axis, so the button flips down to top to
show the back button. The last parameter is the flip direction: EINA_TRUE
means clockwise.
<code c>
_flip_effect(Evas_Object *obj, Evas_Object *obj2)
{
Elm_Transit *trans;
trans = elm_transit_add();
elm_transit_object_add(trans, obj);
elm_transit_object_add(trans, obj2);
elm_transit_effect_flip_add(trans, ELM_TRANSIT_EFFECT_FLIP_AXIS_X, EINA_TRUE);
elm_transit_duration_set(trans, 3.0);
elm_transit_go(trans);
}
</code>
next page__: Creating a Blend Transition